It’s August, which means school is here. For people starting school in July, it is never too late to make your own school supplies. And for people starting in September, come back to this article in a month. Enjoy your summer while it lasts!
School is something most people dread, but this DIY is guaranteed to make school less dreadful. Whether you are in highschool, highschool, college, or possibly you just need some unique supplies for your office at work, this article is for you!
DIY WRITTEN NOTEBOOK
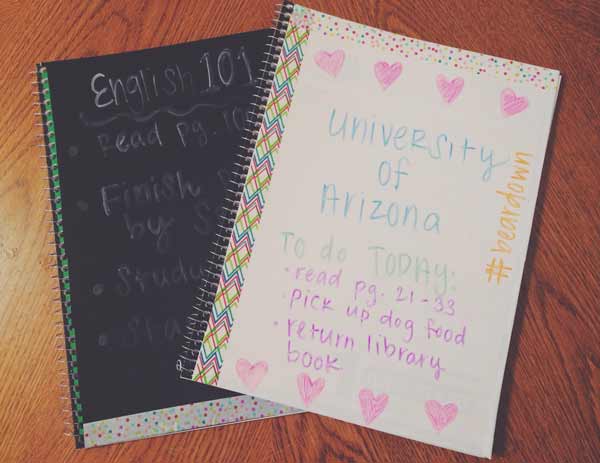
Notebooks are a staple in virtually any backpack, so why not make yours stand out from the crowd?
What do you need:
Notebooks (Target, $0.17)
Dry Erase or Chalk Tape (Office Depot, $5.99)
Optional: Washi Tape
All you must do for this DIY is take your masking tape of choice and wrap the tape all over the front cover (you can even do this to the back cover!) of the notebook. You can add some colourful washi tape for extra flare and you are done! Now you can doodle (and DELETE!) your entire notebook. Or you can use this notebook as an organizational tool.
Write your homework or to-do list on the notebook cover, so you never lose track of your tasks!
Tip: If you find air bubbles after placing the tape, use a credit card to smooth them out!
DIY GOLD FOIL NOTEBOOK
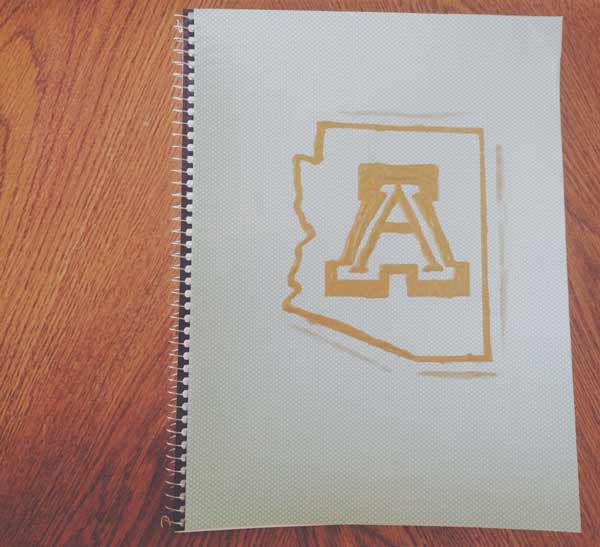
Products with gold foil prints are very popular right now and they’re absolutely lovable!
What do you need:
Notebooks (Target, $0.17)
Metallic gold paint, preferably acrylic (Walmart, $1.25) *spray paint works, but is a bit messy
Foam Brush (Walmart, $3.95)
Stencil (I made mine from my printer at home)
Optional: Mod Podge, & scrapbook paper
(If you are proud of the colour of your notebook, you can skip step one.) First, use scrapbook paper to decorate the cover. Cut the sheet to the size of the notebook and glue it to the cover. With your stencil of choice (otherwise you can give it up freely!), use your foam brush to apply the gold paint. If you used spray paint, cover the rest of the notebook (any area you do not want to gold) so the paint does not spray everywhere. Remove the stencil and wait for the paint to dry totally.
Tip: Use a small brush when applying the gold paint so it stays in the stencil!
GLITTER GRADIENT FOLDERS
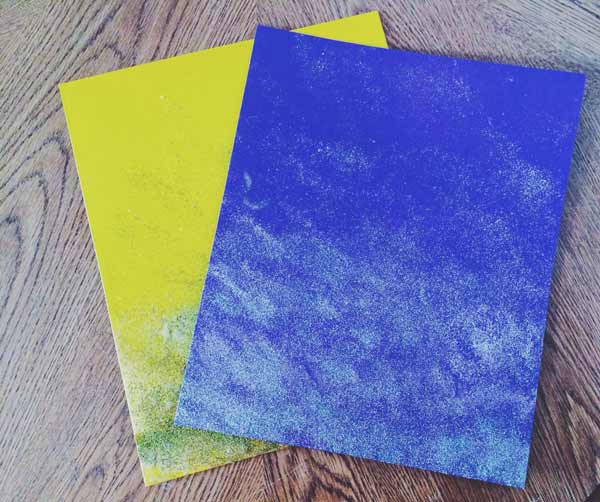
The gradient does not look too great in the picture, but it ends up looking really cute, trust me. You can even use this technique for notebooks if you want all your supplies to match!
What do you need:
Folder, color of your choice (Walmart, $0.25)
Glitter, the colour of your choice (I used glitter from the Martha Stewart 24 pack, $17)
Spray adhesive (Michaels, $7.99)
Mod Podge (Michaels, $7.99)
Foam Brush (Walmart, $3.95)
First things first, take your spray adhesive and apply it all over the folder (more on the bottom, less on the top). Start by sprinkling your glitter on the bottom. The bottom will need the thickest amount of glitter, and the top will be lighter to form the gradient. Continue splashing until you reach the top, adding less and fewer as you go up. You can use multiple colours for this (doing an ombre color effect would look really cool!) or simply one, it is up to you. Once you have finished adding the glitter, let the adhesive dry totally. Then, take a foam brush and a little bit of Mod Podge (do not worry, it is clear to dry!) and add a layer of glue over the glitter. This will make sure that the glitter will stay in place, so you will not have quite a lot of glitter at the bottom of your backpack at the end of the day. Let the Mod Podge dry and you are done!
Tip: Try not to use too much glue, or the folders will start to twist. If it rolls, put it down
something heavy on it to straighten it!
DIY BACKPACK
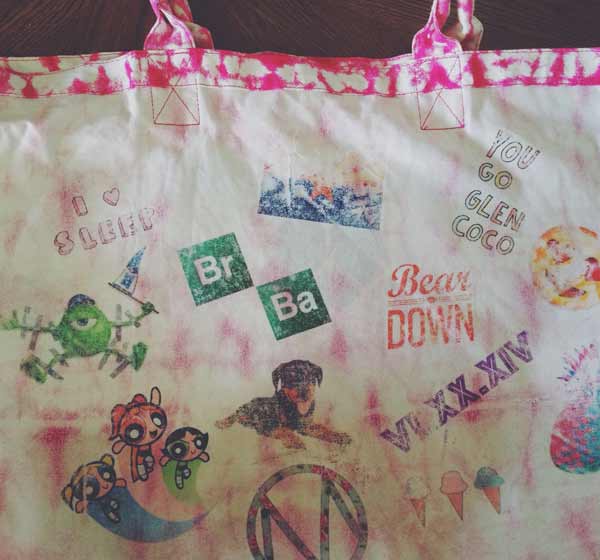
This backpack is so much fun because it is totally personalised by you! You are free to make it according to your personality.
What do you need:
White/light coloured backpack or bag (Walmart, $10)
Iron-on transfer paper (Walmart, $7.80)
Think about the general vibe you want from your backpack. Do you want it to be tumblr-esque? Or maybe you want a vintage 90s vibe? However you decide to go with it, choose an image that fits the theme you are trying to attain (I find that .png images work best).
Here are some ideas: If you want a vintage 90s theme, use a solid coloured backpack (or a belt for this theme would be cool!) and use images like Lisa Frank, Rugrats, Troll Dolls, PowerPuff Girls, etc. For tumblr backpacks, try to Google “tumblr .png” and you’ll find lots of various images. The phrases, Nutella, pineapple, literally every classic tumblr image you can think of.
Once you find the image you want, add it to the word document. Print the document on ironing paper and follow the directions listed for your ironing paper (every brand is different, so you will want to pay attention to yours). Cut out the pictures and spread all of them over the backpack where you want them. Still following the instructions, iron on the picture. Wait is also cool and you have your own personal backpack! Tip: Try to find a really light coloured backpack for best results – the lighter, the better! Dark colours, particularly black, will not work! I used acid-washed white and pink tote bags, so my image did not look as vibrant. My photos end up looking distressed, which I still love!
DIY ADDED PENCIL CASE
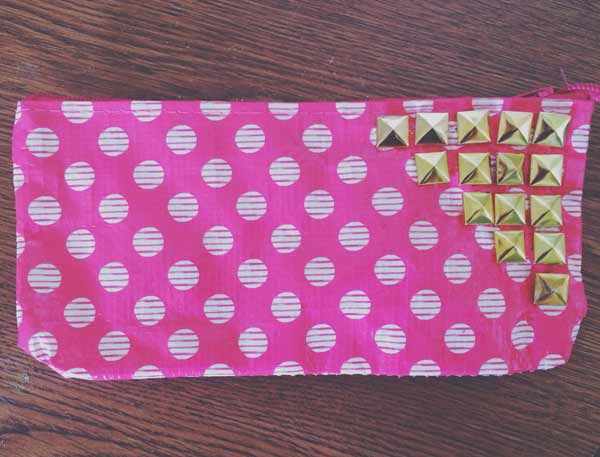
You’ll need something to hold all of your pencils, pens, and highlighters!
What do you need:
One pencil pouch or cosmetic bag (Target, $1)
Studs (Amazon, $1.65)
Optional: Fabric paint
For this DIY, all you’ll do is attach buttons in a triangular formation along the side of your pencil case. My buttons have prongs on the back, but if yours does not have any, use fabric glue to attach the buttons. It’s so easy but ends so funny!
Tip: If you want to give your pencil case extra flare, sprinkle some fabric paint all over the surface of the bag before adding the buttons!
STICKY NOTE BINDER
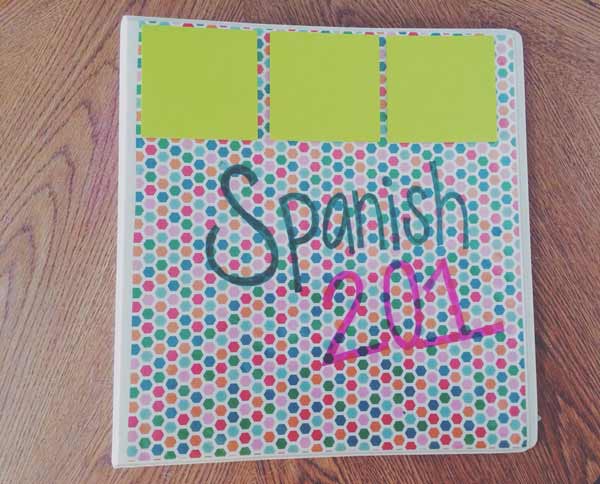
This one is not only cute, but also very helpful for your organization and straightforward note-taking.
What do you need:
Plain binder (Target, $5)
Sticky Notes (Target, $2.99)
Gorilla Glue (Target, $4.99)
Anything to decorate (I used scrapbook paper from Michaels)
First, you will want to start by decorating your binder any way you like. I cut some writing paper and placed it inside the clear part of the binder cover. You can add a few collages of your favourite memorable photos, write your class names on paper, otherwise you can keep it easy and add nothing to scrapbook paper. After decorating, you are going to take the sticky notes (I used one piece of paper, divided into thirds) and glue it to the top of the binder. You can glue it on the inside or outside of the cover. I chose to stick it out so I did not even must open the binder to take notes. I used gorilla glue for this because I find it the strongest in terms of holding sticky notes. Once the glue dries, you will have a cute binder that comes with sticky notes for straightforward note-taking and reminders without having to take out a complete notebook to jot down your thoughts. Tip: Don’t glue the sticky note to the very top of the binder – glue it to the edge of the clear plastic. This way, you can replace your scrapbook paper without having to tear up the sticky notes!
WASHI TAPE… ANYTHING
Washi tape is possibly my favourite thing. This last DIY is in fact not DIY, but more of a suggestion. To add flare to any of your school supplies, add washi tape
decor. It works for staplers, tape dispensers, notebooks, binding folders, pencils, pens and much more. Washi tape is a wonderful creation!
My hope is that you can return to school (or work!) feeling good about your new supply. Stay focused, stay organized, and rock this school year!
